
Ever snapped a photo of your pet, kid’s drawing, or favorite vacation scene and wished you could stitch it onto a tote bag or jacket? You’re not alone—turning everyday pictures into embroidered art is easier than you think, and it’s a total game-changer for personalizing gifts or adding flair to your wardrobe. With the right tools and a few simple steps, anyone can transform a snapshot into a stitch-ready design that pops with color and texture. This guide walks you through the entire process, from picking the perfect image to watching your embroidery machine bring it to life. Let’s dive into how to convert photo to embroidery file.
Why Turn Photos into Embroidery Patterns?
Converting photos to embroidery opens up endless creative possibilities. You’re not stuck with generic patterns from online shops—you create something truly unique. Imagine stitching your dog’s goofy grin onto a pillow or your family portrait onto a quilt. It’s personal, heartfelt, and impossible to find in stores.
This process also saves money. Professional digitizing services can be pricey, but doing it yourself with affordable software puts you in control. You tweak designs on the fly, resize them, or recolor them to match your vibe. For small business owners, it’s a way to offer custom pet portraits or branded merch without breaking the bank.
Plus, embroidery adds a premium, tactile feel that prints can’t match. Your photo becomes a durable, textured masterpiece that lasts for years.
Choosing the Right Photo for Success
Not every picture works well for embroidery, so start smart. Pick a high-resolution image—300 DPI or higher—to ensure crisp stitches. Blurry or pixelated photos turn out muddy in thread, so aim for clear, well-lit shots.
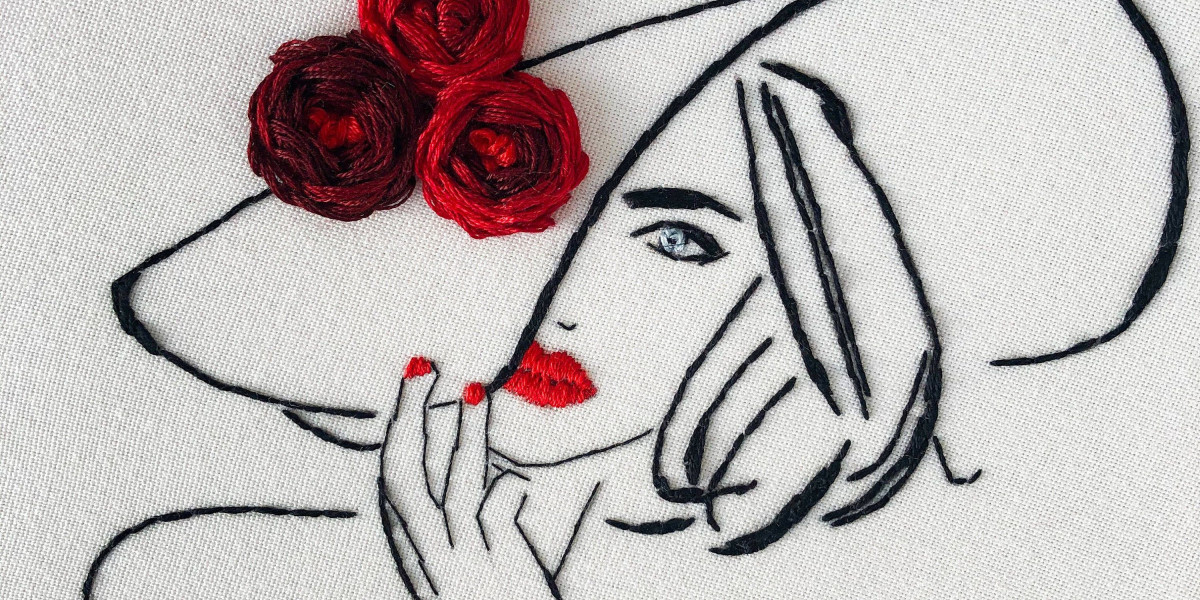
Simple, bold images stitch best. Think of a silhouette, a bright flower, or a face with strong contrast. Complex scenes with tons of tiny details—like a crowded beach—get lost in stitches. If your photo has too many colors, simplify it later in software to keep thread changes manageable.
Crop out clutter and boost contrast using free tools like GIMP or Canva. A clean, focused image sets you up for a stunning embroidery pattern.
Tools You Need to Convert Photos
You don’t need a fancy setup to get started. Embroidery software is the star here. Embrilliance Essentials is perfect for beginners, letting you import photos, digitize them, and export as stitch files like PES or JEF. For more control, try Wilcom Hatch or Bernina ArtLink.
On a budget? SewArt is affordable and user-friendly, while Ink/Stitch—a free Inkscape plugin—works great for vector-based conversions. All these tools let you turn photos into embroidery patterns with a few clicks.
A decent computer runs the software smoothly. If you’re working from a physical photo or drawing, a scanner or good camera captures it clearly. A USB drive transfers files to your embroidery machine, unless it supports direct connections.
Step-by-Step Guide to Converting Your Photo
Ready to stitch? Follow these steps to convert your photo into an embroidery pattern.
First, prep your image. Open it in GIMP or Photoshop and crop to the main subject. Increase contrast and reduce colors to 8-12 shades—embroidery thrives on bold, defined areas. Save as a high-quality JPG or PNG.
Open your software and import the photo. In Embrilliance, for example, select “New Design” and upload your file. Scale it to fit your hoop size—4x4 or 5x7 inches are common for most machines. Use the grid to size accurately.
Now, digitize the design. Trace outlines with running stitches for borders, like a pet’s ears. Fill larger areas with satin stitches for glossy effects or tatami for solid coverage. Assign thread colors from your palette, sticking to brands like Madeira or Sulky. Preview the stitch-out to check density—too dense puckers fabric, too sparse looks thin.
Export the file in your machine’s format, like PES for Brother or JEF for Janome. Save to a USB, transfer to your machine, and test on scrap fabric. This catches issues like thread breaks or misalignment. Tweak in the software if needed, then stitch your final piece.
Tips for Picture-Perfect Embroidery
Want your design to shine? Keep these tips in mind. Simplify your photo upfront—gradients and tiny details don’t translate well to thread. Focus on bold shapes and strong contrasts for clean stitches.
Match your design to your fabric. Use tear-away stabilizers for sturdy materials like cotton, cut-away for stretchy ones like knits. Hoop tightly to prevent shifting, but don’t stretch the fabric.
Check your machine’s tension settings. Most have a default that works, but specialty threads like metallics may need tweaks. Clean your machine regularly to avoid jams.
Play with stitch types for texture. Satin stitches add shine to outlines, fill stitches cover large areas evenly. Scale thoughtfully—big designs strain your machine, tiny details get lost.
Avoiding Common Conversion Mistakes
You’ll hit bumps if you’re not careful, but they’re easy to dodge. Starting with a low-quality photo is a rookie mistake—always use a sharp, high-res image. Skipping the test stitch is another no-no; it reveals flaws like skipped stitches or poor scaling.
Software compatibility can trip you up. Update your program to match your machine’s firmware to avoid file errors. Double-check your export format—PES won’t work on a JEF-only machine.
Rushing digitizing creates sloppy results. Take time to trace clean paths—jagged lines stitch poorly. Test on scraps to perfect your settings before committing to your final fabric.
Bringing Your Photo to Life in Thread
You’re now ready to convert photo to embroidery file like a pro. From picking the right image to mastering the digitizing steps, this process lets you create one-of-a-kind stitched art. Whether it’s a pet portrait, a family memory, or a custom logo, your embroidery machine can bring it to life with vibrant, lasting stitches.
Start small, experiment, and don’t fear a few test runs. Each stitch gets you closer to perfection. With practice, you’ll turn any photo into an embroidery pattern effortlessly. So, grab your favorite picture, fire up your software, and let your creativity thread the needle!